
Infused Oil Tutorial

Oh let’s have some fun! Roll up your sleeves and get ready to feel all herbal-icious by making some infused oils!
What is an infused oil and why you should make them
If you’ve never heard of infused oils let me explain what they are. Basically, an infused oil is where you take an herb and soak it in oil (such as olive oil) for an extended period of time. This allows many of the beneficial chemical qualities from the herb to extract into the oil. Once you’ve let the herbs soak, you then strain off the herbs and the oil is ready to be used in many different body care recipes. (They can also be used for culinary purposes, but today I’m talking about oils for body care.)
Making herbal oils can be crazy intimidating. First off, there are so many ways you can make them you may have a hard time deciding which method is best. And second off, you may be questioning what to even do with an oil if you do choose to make one!
Well I’m here to show you how having options is a good thing, and how it doesn’t have to be intimidating. And I also want to give you some great application ideas. For example, you could use calendula infused oil as a base for a wound salve. Or you could use chamomile infused oil in a body butter for after shaving, or as a baby butt balm. You could use arnica to create a salve to help heal bruises, or st. John’s wort to help relieve back pain. There are so many great ways to use the oils.
So if you’re ready for me to break it all down for you, I’m ready to show you how easy it is to make herbal infused oils!

The first thing you will need to decide is which herbs to use and what type of oil.
There are so many beautiful options it can be hard to choose! Maybe you have a recipe already in mind that will determine what kind of infused oil to make, or maybe you just want to play and have some on hand for the future! I have provided you with a little cheat sheet of a few different great beginner herbs and their benefits at the end of this article. But if you’re still stumped, go with calendula! It’s a great herb for so many skincare needs that you will have no problem finding a use for it. Bonus points if you grow it yourself! ;)
As for what type of oil to use, great ones would be olive oil, apricot oil, jojoba oil, or sunflower oil. I’ve linked to a great source for oils if you want to check it out. Again, the type of oil will depend on what your application will be and perhaps what your skin type is. I plan on doing a more in-depth post on carrier oils that will help you decide. Stay tuned.
Fresh or dried herbs?
Do I use fresh or dried herbs?? That question was never very clear to me when I first started. To make it easy on yourself, I would strongly recommend only using dried herbs. You can use fresh, but that introduces water into your oil which can cause your infused oils to go rancid rather quickly. If you do choose to use fresh, I would at the very least, wilt your fresh herbs for 12 or so hours to remove at least some of the water content.
The next thing to decide before making an herbal oil is how soon do you need it?
I generally tend to need them, um, yesterday. But if you are ahead of the game and are just making oils to have on hand then your method of making oils may be flexible.
Here I’ll show you.
The 3 main ways to make an herbal oil include
Solar infusion—which uses the suns heat and energy
Cold infusion—which uses time to allow the oils to soak up the herbs goodness
Heat infusion—which speeds up the infusion process and allows an oil to be ready quicker
Now before I dive more into which method you should use, let’s just hop to prepping the oils. It will take you a matter of minutes. Literally. Go grab whatever herb you chose and your oil. You will also need a glass jar with a lid. Mason jars work famously. I would recommend starting small, unless you have a recipe that you need a large amount of oil for. Personally I prefer using either the small jelly sized mason jars or at most the pint sized ones (2 cups).

How to make an infused oil
This method is called the Folk method because there are no exact measurements. The idea here is to thoroughly saturate the herbs with the oil plus allowing the oil to cover the herbs just a wee bit.
You will need:
Herb of choice (dried)
Oil of choice
Glass jar with metal lid (thoroughly cleaned and dried)
Directions
The size of jar you choose is up to you. It all depends on how much oil you want to end up with. If you’re just playing and don’t need gallons of oil, I recommend using a pint sized mason or perhaps even smaller.
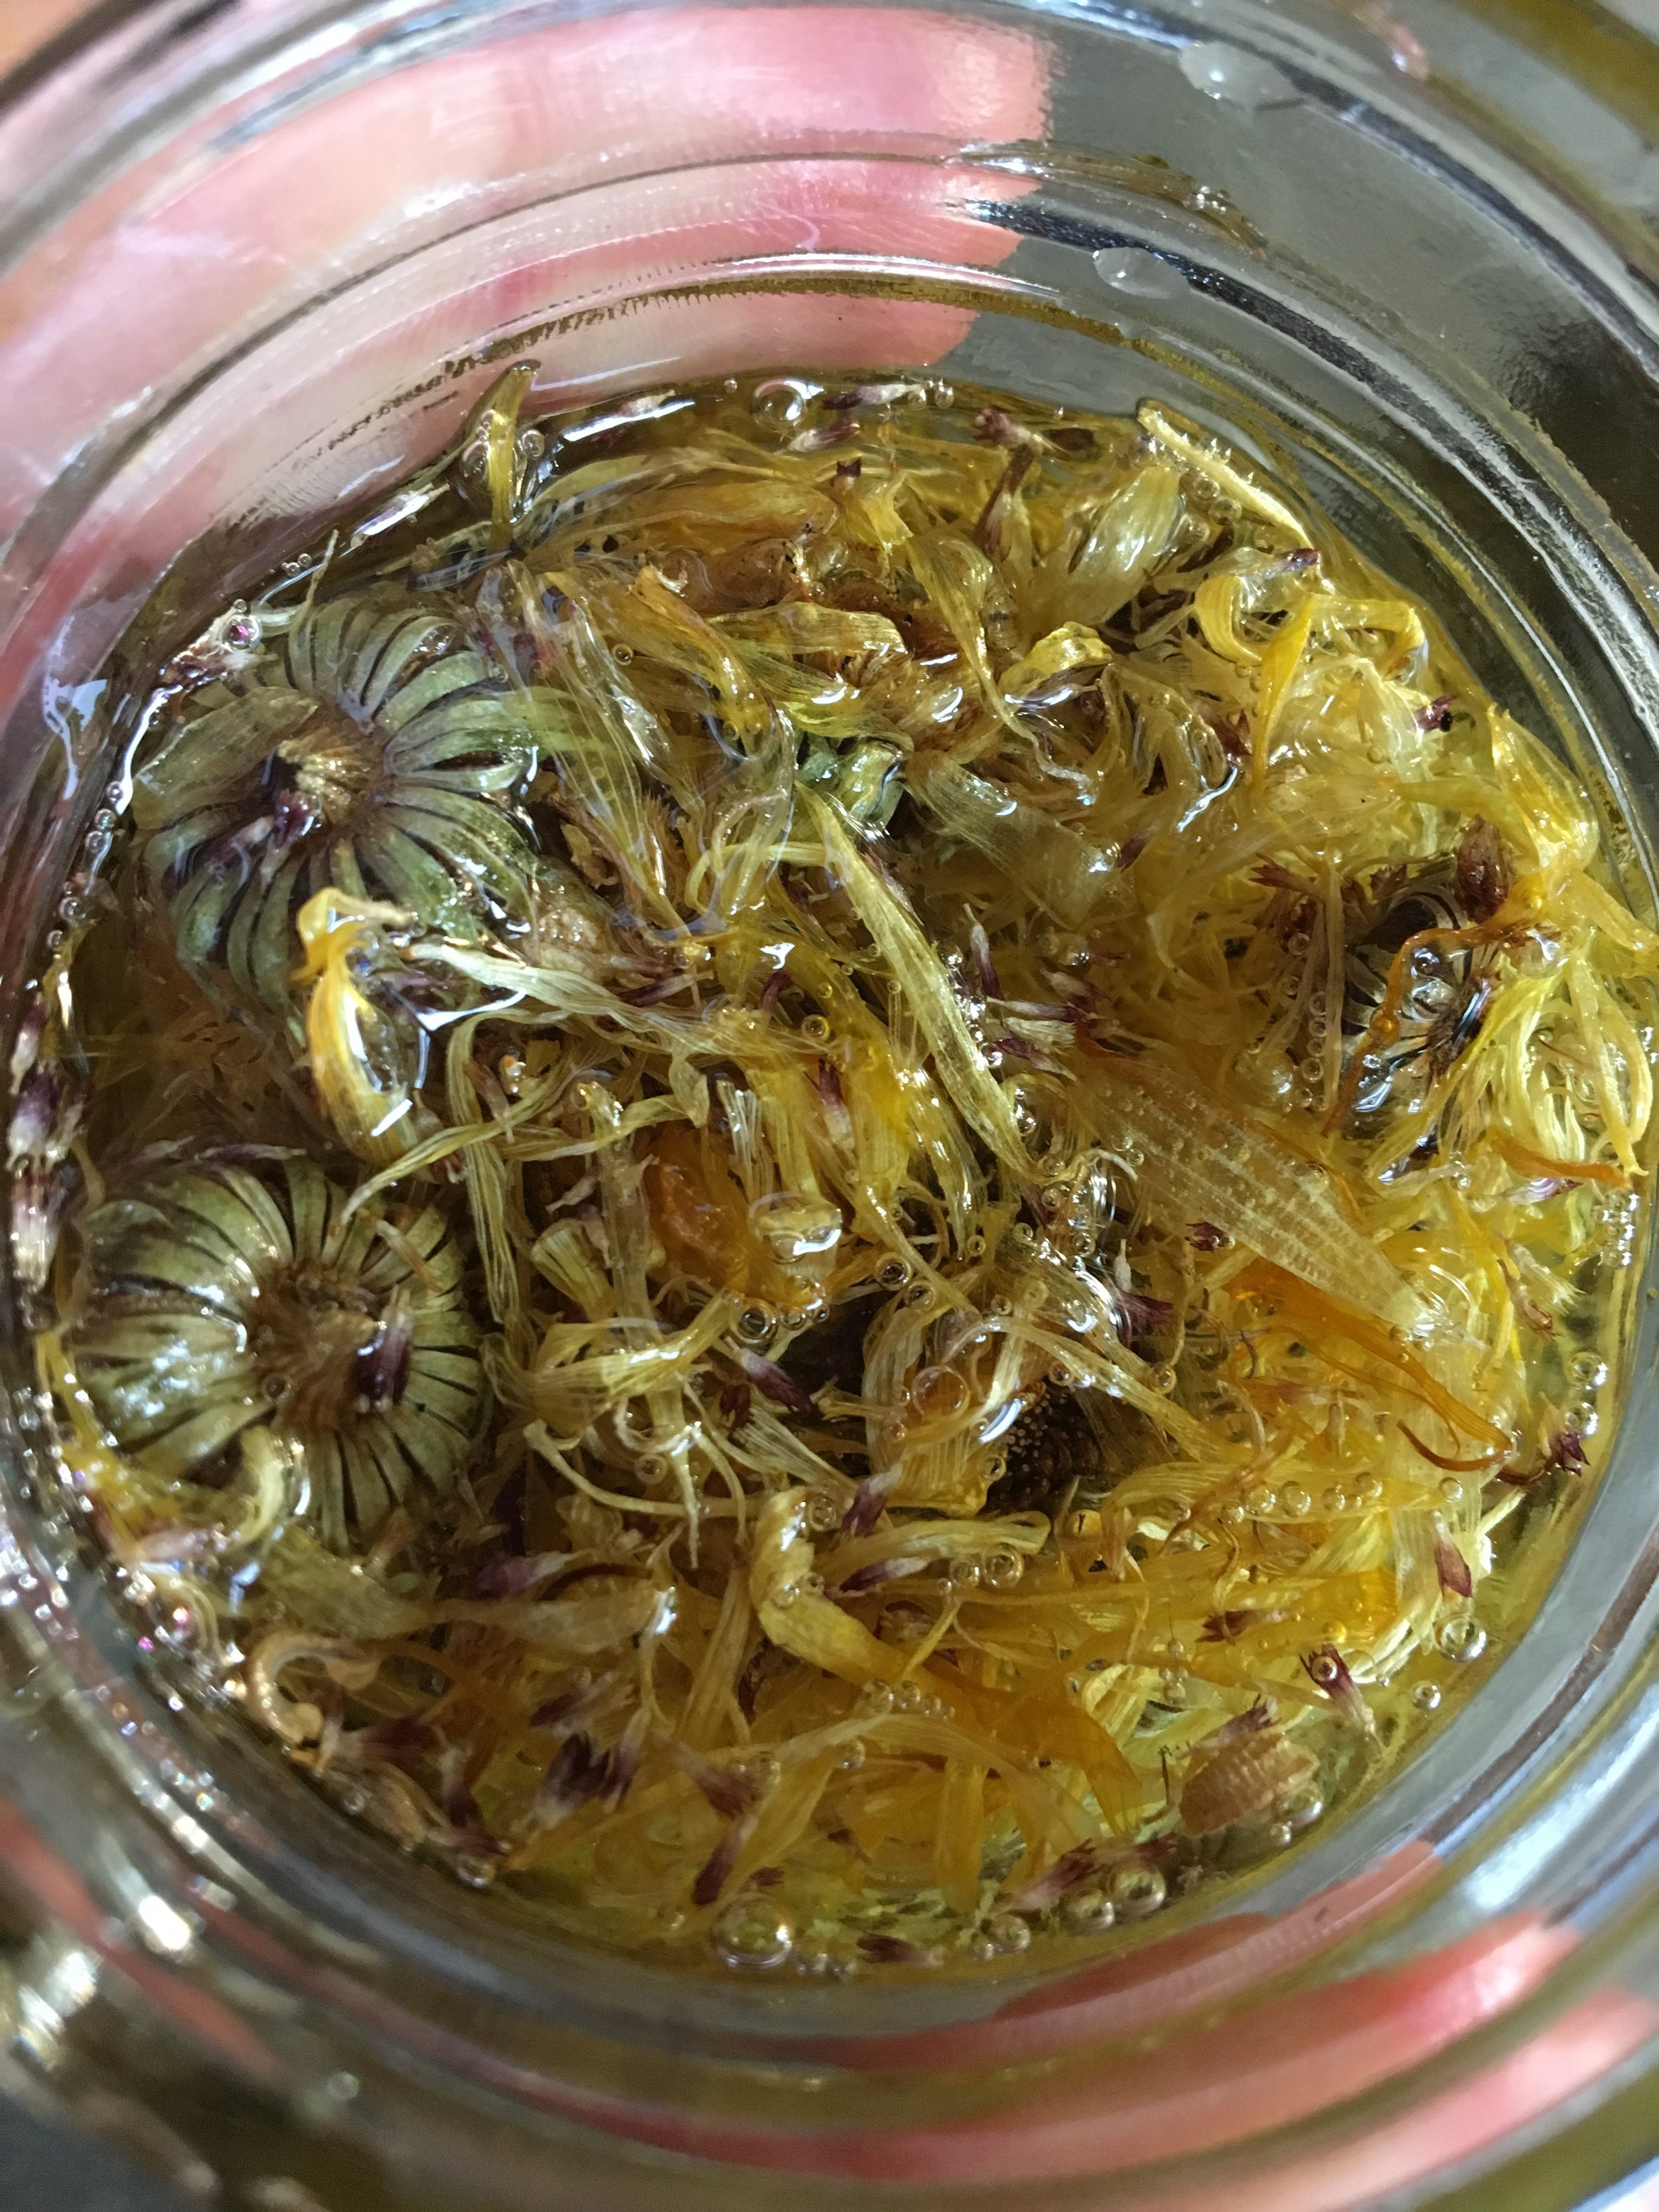
Fill your jar not quite to the top with the herb of your choice. You will be pouring the oil over the herbs and bringing it to just barely cover all the herbs. Once you’ve covered the herbs, I like to poke a spoon around to release any air bubbles and to make sure all the herbs are covered with oil. You may want to check the oil level after an hour or so and add more oil if any herbs are not fully covered.
Once you’ve completely saturated them with oil be sure to label the jar with what herb and oil you used along with the date. You will then need to decide which method you wish to use for the actual infusion process. I will break down the various methods so you can choose the best option for you.
Infusion Options

Solar Infusion
Depending where you live this might be a fabulous option for you. Solar infusion uses the energy and heat from the sun to draw the beneficial properties into the oil. You can set your tightly covered glass jar either outside in the sun (protected from animals and children) or inside by a window where the sun shines brightly. Because the sun can get so hot, some manuscripts say to cover your jar with a paper bag or to use a dark colored jar so you don’t fry the herbs. Other manuscripts say that the sun’s heat is beneficial to releasing the nutrients. So I’d say use your judgement and experiment. Do shake the jar occasionally, though, and allow this to infuse for 2-3 weeks. After that time you can take your oil and strain off the herbs.
Cold Infusion
If you don’t want to worry about the sun over-heating your herbs, you may prefer the cold infusion process. Basically you do the same thing as above by tightly covering your labeled jar but then instead of sitting it in the sun, you stick it in a cool cabinet and allow it to infuse there for the 2-3 weeks. You will want to shake it occasionally and after the couple weeks is up you can strain off the herbs.
Heat infusion
And finally we have the quick option for making herbal infused oils for those who are in a hurry! This method adds a small amount of heat that quickens that whole process up by drawing out the nutrients more quickly. There are many ways to add heat so I will outline a few options for you.
Stove Top Method
The quickest way to infuse your oil is on the stove top. You will need a saucepan with a small amount of water, making sure the water can’t get into your glass jar. Place your herb/oil jar into the water and turn the heat on low. Allow this to simmer for 4-8 hours. Make sure it never gets hotter than a simmer or you could scorch your oil or herbs. Occasionally check your water level so you don’t ruin your pot or the oil! After several hours remove from the heat and allow the oil to cool before carefully straining off the herbs
Oven Method
Another quick way is in your oven. Make sure your herb/oil mixture is in a glass jar with no lid. Before putting the oil in the over, heat it to 250*F. Now go ahead and place the herb/oil mixture into the oven and immediately turn the the oven off and leave the door closed. You will allow the oil to sit for 24 hours. After that time you can remove the oil and strain off the herbs!
Yogurt Maker Method
This other option takes a little bit longer, but if you have a yogurt maker it works beautifully. Yogurt makers heat the yogurt at a consistent 100-110*F which is a perfect temperature for the oil to infuse at. So all you do is place your covered glass jar and keep it in the yogurt maker for at least 24 hours and up to 72 hours. After that, you can remove the jar from the yogurt maker and strain off the herbs. This tends to be my favorite method because I feel it gives a consistent result.
Crockpot Method
If you do not have a yogurt maker you can also use a crockpot. But you will want to maker sure your crockpot has a very low setting that won’t scorch the herbs. If you have a “warming” setting that should be perfect. You will do exactly like with the yogurt maker and place your covered glass jar inside the crockpot and allow the oil to sit for at least 24 hours and up to 72 hours. Then remove the jar and strain off the herbs.
And there you have it! Many ways to make an herbal infusion and not one of them are wrong. ;)

How to strain off the herbs
After your herbs have finished infusing for the proper length of time it’s time to strain off the herbs. If you have never strained off herbs before here’s a quick little how-to.
You will need:
Your herb/oil mixture
Another clean and dry glass jar with lid
A clean old thin towel or t-shirt to use for straining
I love using old tea towels and cutting them in smaller squares. I find it absolutely ridiculous to purchase cheesecloth which is what most people recommend. Use what you have and save yourself some money!!
Rubber band
Directions:
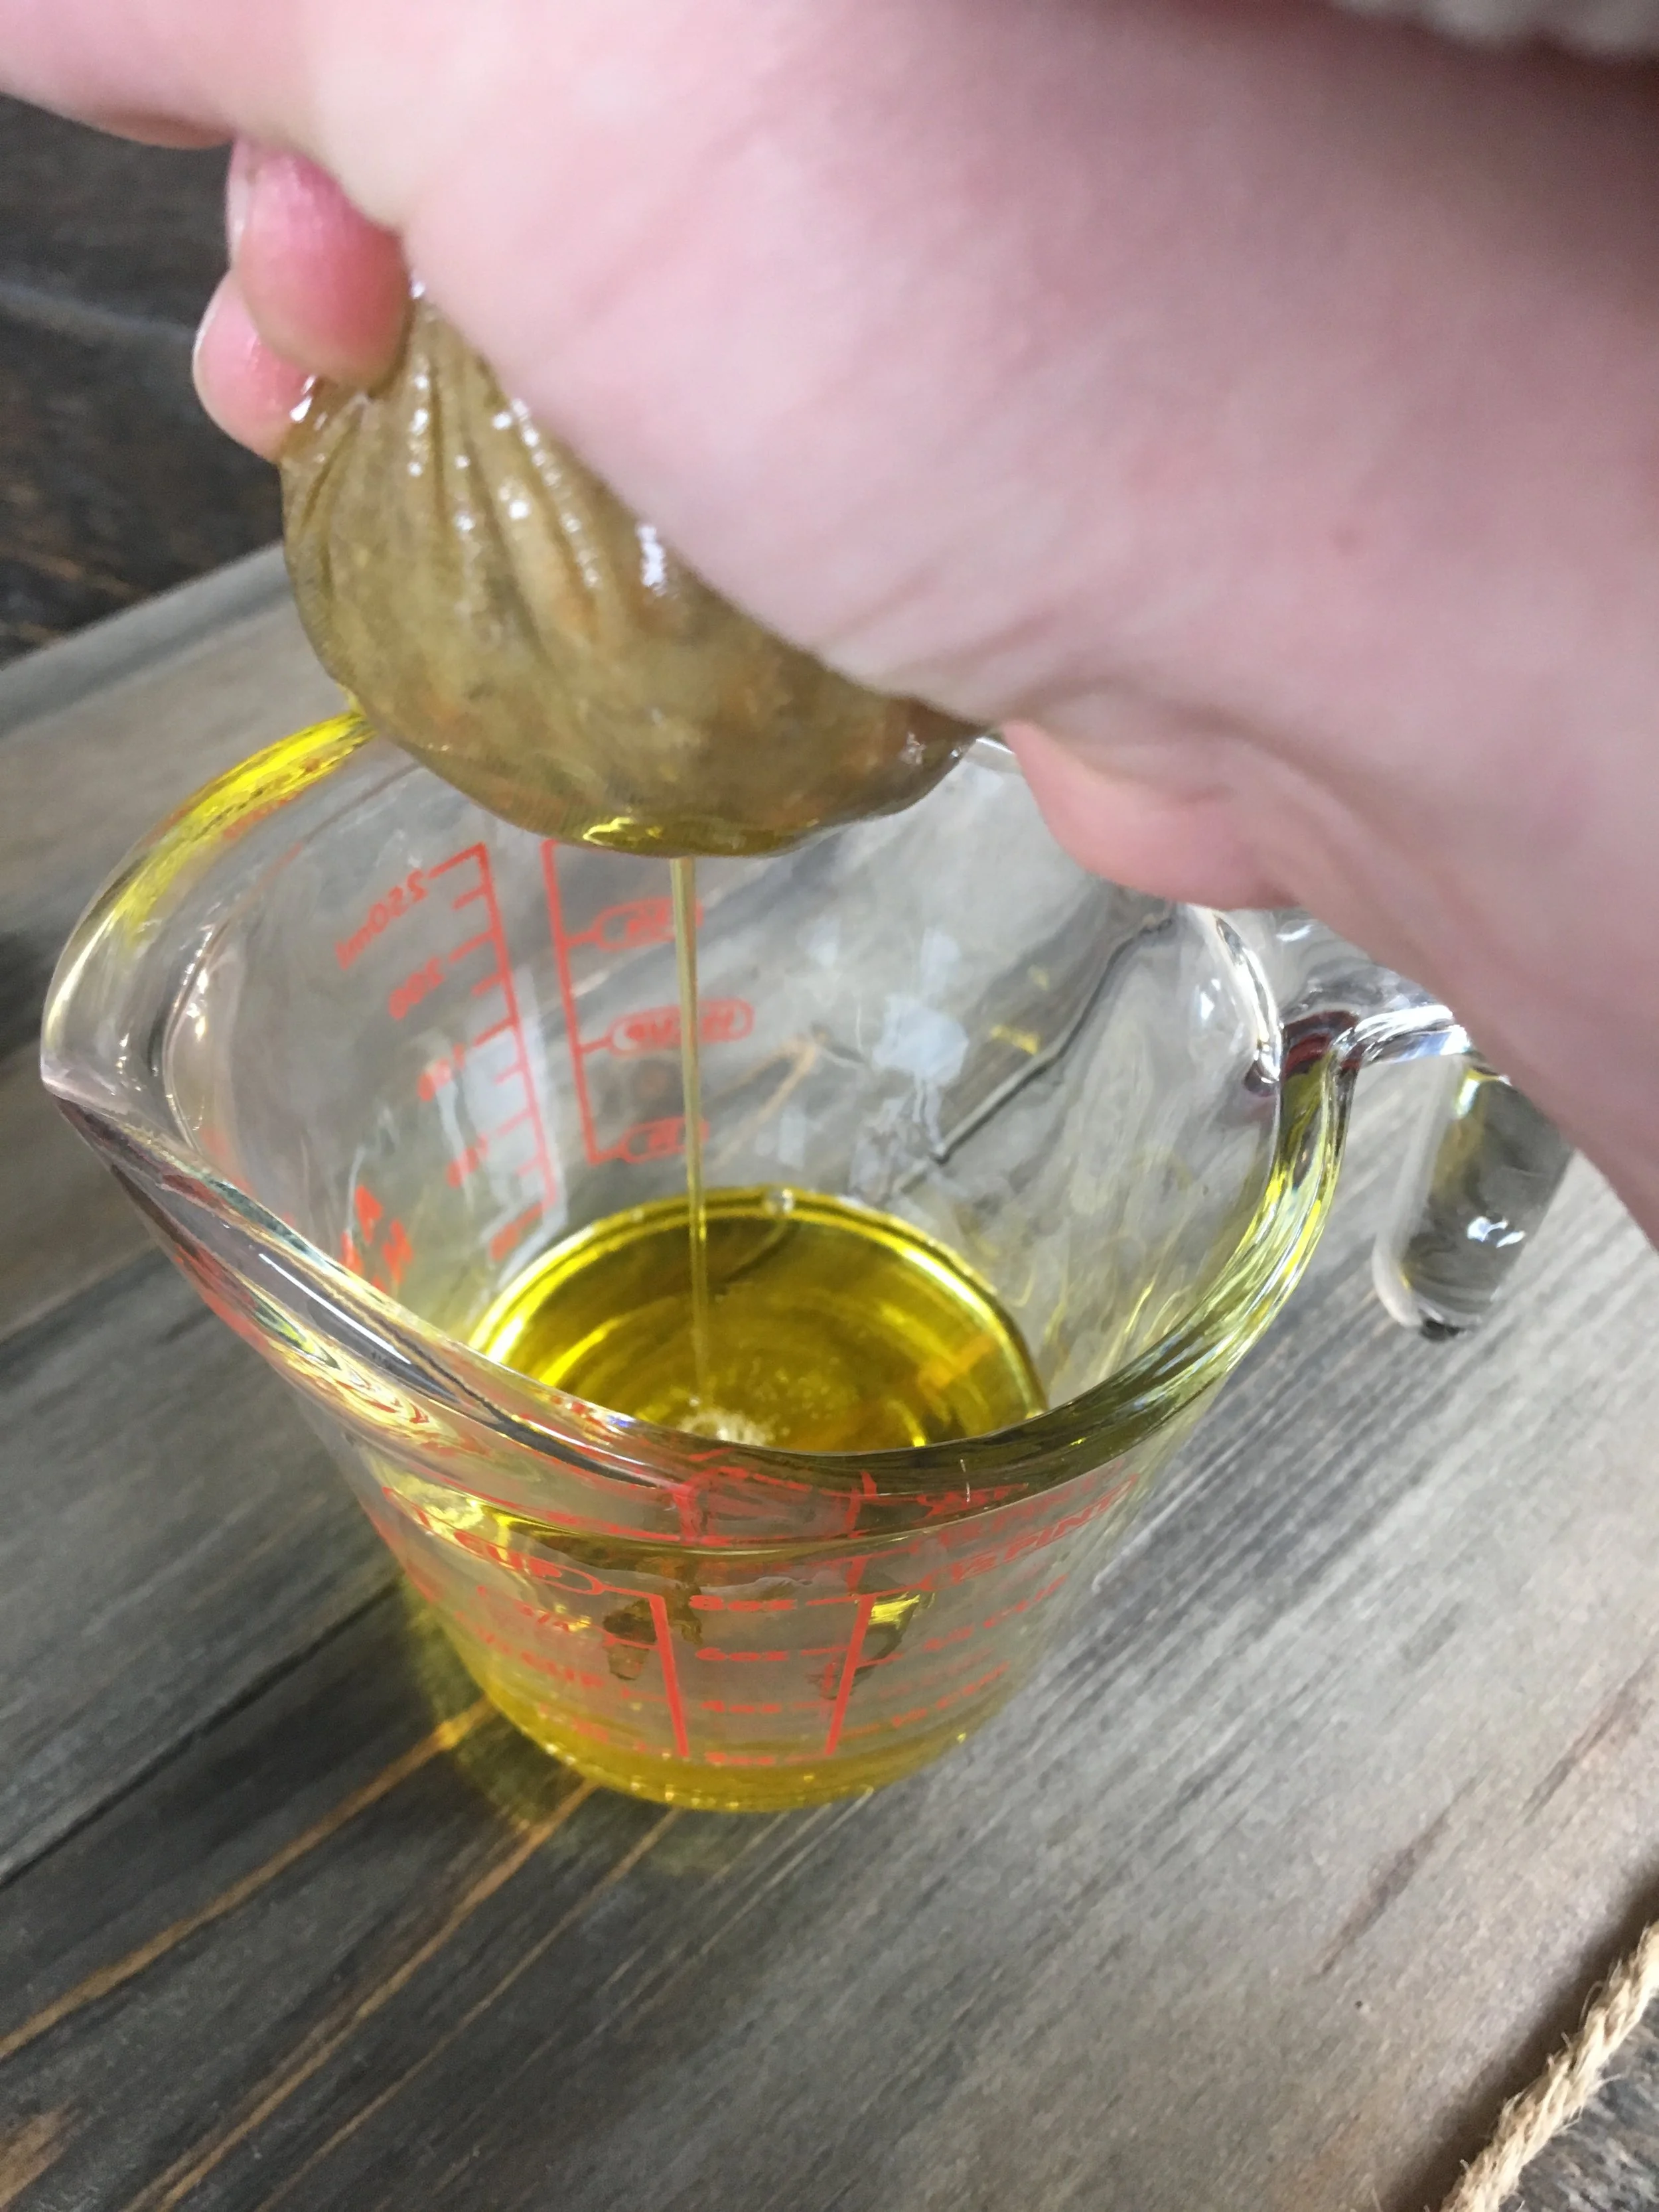
Place the towel over the clean glass jar and secure it with a rubber band. Carefully pour the herb/oil mixture into the towel and allow the oil to drip down into the other jar. Once you get all the herb/oil mixture into the towel, you can remove the rubber band and gather up the towel and squeeze out all the oily goodness. Don’t waste a drop!! Once you get it all squeezed out, you can discard the herbs into your compost pile. Then cap your infused oil, label and date! Store it in a cool dark cupboard.
The shelf life on infused oils will vary depending on the type of oil you used, whether you used fresh or dry herbs, etc. They could last up to a year if properly stored.
Herbs that make great infused oils
Here is a quick little guide for you on some great herb options and what they might be used for.
Arnica flowers—external use only
Great for healing bruises, sprains, and muscle pain. Arnica is an Anti-inflammatory and analgesic (pain reliever).
Suggested use: In a salve to promote healing of bruises or muscle pain.
Calendula flowers
Very calming and soothing to the skin. Helps to rebuild tissue and promote healing. Anti-inflammatory, analgesic, anti-spasmodic, anti-microbial, and anti-fungal.
Suggested use: In a cream to use after shaving to promote healing and reduce inflammation and any infections from in-grown hairs. Also wonderful for diaper rash.
Chamomile flowers and leaves
Great for easing itchy or sore skin and even eczema. Anti-inflammatory, and anti-spasmodic.
Suggested use: In a cream to soothe eczema or other skin inflammation.
Comfrey leaves
Comfrey is well known for its ability to help heal bruises, sprains, strains, fractures, and broken bones. It contains a compound that actually helps to repair damaged tissue. Anti-inflammatory and astringent.
Suggested use: As an ointment applied to bruises, or use the infused oil by itself to help promote sprains to heal.
Yarrow flowers and leaves
Yarrow is quite well known as a wound healer and for its ability to stop bleeding. Anti-inflammatory, anti-spasmodic, and astringent.
Suggested use: As an ointment to promote healing for cuts and scrapes.
St. John’s Wort flowers
Externally St. John’s Wort is helpful for wound and burn healing, as well as for relieving cramps and nerve pain. Anti-inflammatory, anti-spasmodic, and analgesic.
Suggested use: In an ointment to help relieve back pain or cramps.

There are definitely other herbs you can infuse into oil, but these should give you a great starting point! If it’s your very first time making infused oils, I would highly recommend calendula since it is so very versatile and so great for the skin.
Where to purchase the ingredients
I appreciate you taking the time to read my blog! By purchasing through one of my affiliate links you will not spend a penny more, but you are allowing me to receive a small commission. This allows me to keep posting great content for you. Thanks for your support!
If you are unable to grow your own herbs, or find ingredients locally, then here are two of my favorite places to buy bulk ingredients:
I would love to know if you already make infused oils what your favorite is. Or if this is your first time, let me know how it goes!!